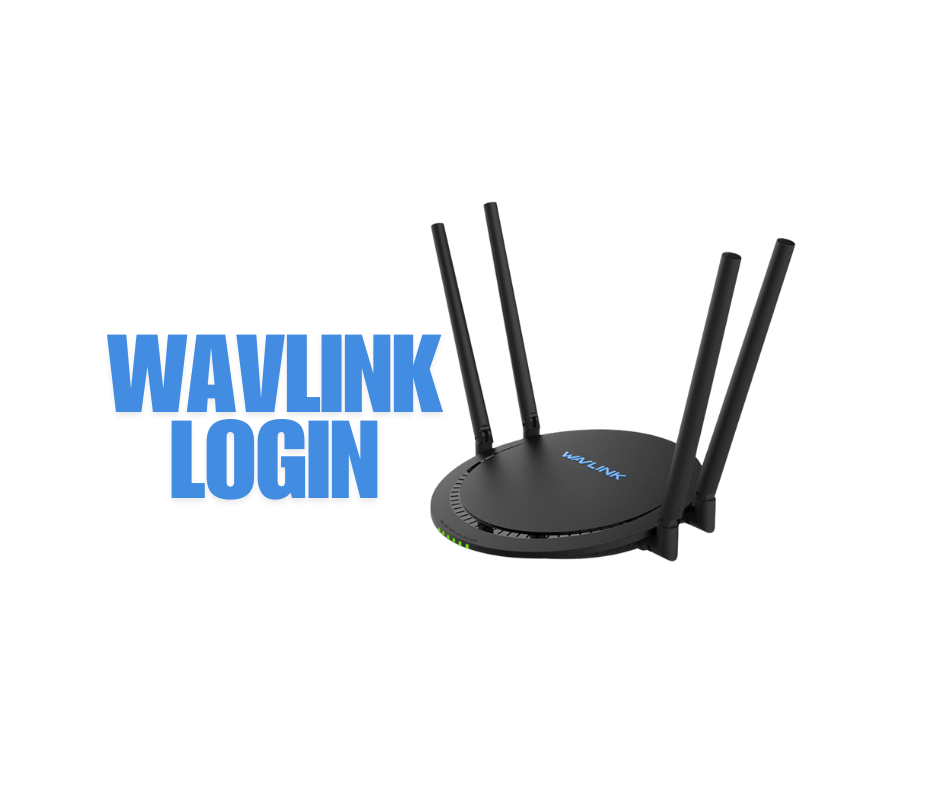
Wavlink devices have carved a niche in the world of networking with their reliable performance and user-friendly design. These devices, which include routers, extenders, and other networking solutions, are designed to enhance connectivity in homes and offices alike. Their functionality is vast, allowing users to extend Wi-Fi coverage, optimize network speeds, and manage connected devices seamlessly.
To unlock the full potential of your Wavlink device, logging into its interface is a critical first step. This login process acts as the gateway to a wide range of customization options, enabling you to configure network settings, update firmware, and bolster the security of your Wi-Fi connection. Whether you’re troubleshooting connectivity issues, setting up parental controls, or adjusting the bandwidth for specific devices, access to your Wavlink account or router interface ensures smooth and efficient network management.
The purpose of this article is to guide you through the Wavlink login process in a straightforward and approachable manner. By breaking down the steps and addressing common challenges, we aim to simplify the experience for users of all technical backgrounds. Whether you’re setting up your device for the first time or revisiting the login interface for adjustments, this comprehensive guide will ensure that you navigate the process with confidence and ease.
Why You Need to Log In to Your Wavlink Device
Logging into your Wavlink device is not just a technical necessity—it’s the key to unlocking complete control over your network. From basic configurations to advanced settings, access to the Wavlink interface ensures that your network performs optimally while staying secure. Here’s why logging in is essential:
Accessing and Managing Network Settings
The Wavlink interface allows you to customize and fine-tune your network settings to suit your needs. This includes:
- Changing your Wi-Fi name (SSID) and password to personalize your network and secure it from unauthorized access.
- Configuring guest networks to provide temporary access for visitors without exposing your primary network.
- Adjusting bandwidth allocation to prioritize devices or applications that require high-speed connectivity, such as video streaming or online gaming.
- Setting up parental controls to restrict access to specific content or limit internet usage during certain hours.
Updating Firmware and Ensuring Security
Firmware updates are crucial for maintaining the stability and security of your Wavlink device. Logging into the interface lets you:
- Check for the latest firmware updates that often include patches for vulnerabilities and performance improvements.
- Apply updates with ease, ensuring your device operates with the most recent features and protections.
- Enable advanced security features, such as WPA3 encryption, to safeguard your network against cyber threats.
Regular updates and proactive security measures help protect your personal information and connected devices from potential risks.
Troubleshooting Network Issues
When connectivity problems arise, logging into your Wavlink device can provide immediate solutions. Through the interface, you can:
- Diagnose and resolve network disruptions by reviewing connection statuses and signal strength.
- Reset specific settings or restore the device to factory defaults when troubleshooting complex issues.
- Monitor connected devices to identify bandwidth hogs or unauthorized users consuming your network resources.
By having access to the Wavlink login interface, you’re equipped with the tools to ensure your network is running smoothly and securely, minimizing downtime and maximizing performance.
Logging in isn’t just about managing your Wavlink device; it’s about having the power to create a network that works for you, tailored to your unique requirements.
Preparation Before Logging In
Before you dive into logging into your Wavlink device, taking a few preparatory steps can save time and prevent unnecessary frustration. These steps ensure a smooth and seamless process, whether you’re setting up your device for the first time or revisiting its interface for updates or troubleshooting.
Ensuring a Stable Connection to Your Wavlink Device
To access the login interface, your device (computer, smartphone, or tablet) must be connected to the Wavlink network. This connection can be established in two ways:
- Wired Connection: Use an Ethernet cable to connect your device directly to the Wavlink router. A wired connection is recommended for initial setup or troubleshooting as it ensures stability and prevents interruptions caused by weak Wi-Fi signals.
- Wireless Connection: Connect to the Wavlink Wi-Fi network using the default SSID (network name) provided with the device. The default SSID and password are usually printed on a label located on the back or bottom of your Wavlink device.
A reliable connection minimizes potential disruptions during the login process and ensures you can fully access the interface.
Checking the Default Login Credentials
Wavlink devices come with default login credentials that allow you to access the interface for the first time. These credentials typically include:
- Username: “admin”
- Password: Often “admin” or left blank (refer to your device’s label or user manual for specifics).
Using the default credentials is a necessary starting point, but changing them after logging in is critical to prevent unauthorized access.
Locating the IP Address of the Router
To access the Wavlink login page, you’ll need the device’s IP address, which serves as the gateway to its interface. The default IP address for most Wavlink devices is often one of the following:
- 192.168.10.1
- 192.168.0.1
You can confirm the IP address by:
- Checking the user manual or label on your Wavlink device.
- Using the command prompt on a Windows device:
- Open the Command Prompt, type ipconfig, and press Enter.
- Look for the “Default Gateway” under your network connection details.
- Checking network settings on a macOS device:
- Open System Preferences > Network > Advanced > TCP/IP.
- Locate the router’s IP address listed there.
By following these preparatory steps, you’ll ensure a hassle-free login experience. With a stable connection, the correct credentials, and the IP address in hand, you’ll be ready to access and configure your Wavlink device with ease.
Step-by-Step Guide to Wavlink Login
Logging into your Wavlink device is a straightforward process, provided you follow the steps carefully. Whether you’re setting up your device for the first time or revisiting the interface for adjustments, this guide ensures you can access and navigate the Wavlink login page effortlessly.
Step 1: Accessing the Wavlink Login Page Through a Web Browser
- Open a Web Browser: Launch a browser on your connected device (Google Chrome, Mozilla Firefox, Safari, or Microsoft Edge work well). Ensure the device is connected to your Wavlink network.
- Enter the IP Address: Type the default IP address of your Wavlink device into the browser’s address bar. Common default IP addresses include:
- 192.168.10.1
- 192.168.0.1
- Press Enter: This will load the Wavlink login page. If the page doesn’t load, double-check your connection and the IP address, or refer to the user manual for device-specific details.
Step 2: Entering the Default Username and Password
- Default Credentials: On the login page, you’ll be prompted to enter the username and password. For most Wavlink devices, the defaults are:
- Username: admin
- Password: admin or blank (check the label on your device).
- Login Authentication: Click the “Login” or equivalent button to proceed. If the credentials are correct, you’ll be directed to the device’s interface.
- Troubleshooting Failed Logins:
- If the login fails, ensure the credentials are correct and haven’t been changed previously.
- If you’ve forgotten the custom credentials, perform a factory reset on the device to restore defaults.
Step 3: Navigating the Wavlink Interface After a Successful Login
- Dashboard Overview: Once logged in, you’ll see the Wavlink dashboard. This is your control panel for managing network settings and device features.
- Explore Key Features:
- Network Configuration: Adjust your Wi-Fi name (SSID), password, and security settings.
- Device Management: View and control devices connected to your network.
- Firmware Updates: Check for and apply the latest updates to enhance performance and security.
- Advanced Settings: Access features such as port forwarding, bandwidth control, and parental controls.
- Save Your Changes: Always save changes after modifying settings to ensure they take effect.
By following this step-by-step guide, you’ll gain access to your Wavlink device’s powerful configuration tools. Whether it’s customizing your network, optimizing performance, or troubleshooting issues, the Wavlink login interface puts full control in your hands.
Common Login Issues and Troubleshooting
Encountering issues while attempting to log in to your Wavlink device is not uncommon. These problems can often be resolved quickly with a bit of troubleshooting. Below, we outline the most frequent login issues and provide practical solutions to address them.
1. Incorrect Username or Password
- Problem: Entering the wrong credentials will prevent access to the login interface.
- Solution:
- Double-check the default username and password. Most Wavlink devices use:
- Username: admin
- Password: admin or blank.
- Refer to the label on the back or bottom of your device for the exact details.
- Be mindful of case sensitivity; usernames and passwords are often case-sensitive.
- Double-check the default username and password. Most Wavlink devices use:
2. Forgotten Login Credentials and How to Reset Them
- Problem: You may have changed the default credentials and forgotten them.
- Solution:
- Use a Password Manager: If you saved your login details in a password manager or browser, retrieve them from there.
- Reset the Device: If the credentials are irretrievable:
- Locate the reset button on your Wavlink device (usually a small hole labeled “Reset”).
- Use a paperclip or pin to press and hold the button for 10–30 seconds until the device restarts.
- The device will revert to factory settings, allowing you to use the default username and password.
3. Network Connection Problems
- Problem: A weak or unstable connection between your device and the Wavlink router can prevent the login page from loading.
- Solution:
- Ensure your device is properly connected to the Wavlink network:
- Wired Connection: Confirm the Ethernet cable is securely plugged into both your device and the router.
- Wireless Connection: Verify that you’re connected to the correct Wi-Fi network (check the SSID on the router label).
- Restart your router and the connected device to refresh the connection.
- Use a different device to check if the issue is specific to one system.
- Ensure your device is properly connected to the Wavlink network:
4. Browser Compatibility Issues
- Problem: The Wavlink login page may not load properly on some web browsers due to compatibility issues or cached data.
- Solution:
- Clear Browser Cache: Clear your browser’s cache and cookies to ensure no old or corrupt data is interfering.
- Switch Browsers: Use a different web browser such as Chrome, Firefox, Safari, or Edge.
- Update Your Browser: Ensure your browser is up to date with the latest version to avoid compatibility issues.
- Access via Incognito Mode: Sometimes, browser extensions or plugins can interfere. Use incognito mode to bypass this.
How to Change Your Wavlink Login Credentials
Securing your Wavlink device with custom login credentials is a vital step in protecting your network from unauthorized access. Changing the default username and password not only enhances security but also ensures that your device remains under your control. Below, we’ll walk you through the process and provide tips for maintaining a secure and efficient login experience.
Importance of Securing Your Device with a Custom Username and Password
The default credentials for Wavlink devices are publicly accessible and commonly used by attackers to gain unauthorized access. By updating these credentials, you:
- Enhance Security: A strong, unique password reduces the risk of breaches.
- Protect Network Devices: Safeguard all devices connected to your network, from smart home devices to personal computers.
- Maintain Privacy: Prevent outsiders from monitoring or altering your network settings.
Step-by-Step Instructions for Updating the Login Credentials Through the Wavlink Interface
- Log In to Your Wavlink Device:
- Access the Wavlink login page via your browser (e.g., 192.168.10.1 or 192.168.0.1).
- Enter your current username and password to access the interface.
- Navigate to the Login Settings Section:
- Look for a tab or menu labeled “Administration,” “System,” or “Account Settings.”
- Select the option to manage login credentials.
- Enter Your New Credentials:
- Replace the default username with a custom one (if supported).
- Create a strong password that combines letters (uppercase and lowercase), numbers, and special characters. Avoid easily guessed information like birthdays or names.
- Save Your Changes:
- Click “Save” or “Apply” to update the credentials. The system may prompt you to re-enter the new username and password to confirm the change.
- Log Back In:
- After saving, you may be logged out of the interface. Use your new credentials to log back in and verify the update.
Additional Tips for Secure and Efficient Login
1. Regularly Updating Firmware for Security Enhancements
- Keep your Wavlink device firmware up to date to protect against vulnerabilities. Check for updates periodically through the interface under the “Firmware Update” or “System” section.
2. Using a Strong, Unique Password for Your Device
- Avoid reusing passwords from other accounts or services. Use a password manager to generate and securely store complex passwords.
3. Logging Out of the Interface After Making Changes
- Always log out of the Wavlink interface after making changes to prevent unauthorized access, especially when using a shared or public device.
Read more: How to use wavlink docking station
Conclusion
Logging into your Wavlink device and securing it is a critical step in managing your home or office network effectively. Through this guide, we’ve walked you through the importance of logging in, the preparation required, common issues you might face, and how to resolve them. We’ve also highlighted the significance of updating your credentials to ensure your network remains protected from potential threats.
By customizing your login details, maintaining a stable connection, and regularly updating the firmware, you’re not only enhancing your network’s security but also optimizing its performance. With these best practices in place, you can confidently manage your Wavlink device and ensure it serves as a reliable backbone for your digital needs.
Whether you’re a novice or an experienced user, taking the time to understand and apply these principles ensures a smoother and safer experience with your Wavlink router. Secure, efficient, and well-configured—your Wavlink network is now ready to meet the demands of modern connectivity.


