TP-Link routers are among the most popular networking devices globally, trusted by millions of users for their reliability, performance, and ease of use. Whether for home or office networks, TP-Link routers provide seamless internet connectivity, ensuring users can stay connected to what matters most.
One of the defining features of TP-Link routers is the array of indicator lights prominently displayed on the device. These lights are not just decorative; they serve as a critical communication tool between the router and the user. Each light provides specific information about the router’s status, connectivity, and overall performance.
Understanding what these lights signify is essential for anyone looking to maintain a stable and efficient network. Router lights can alert users to potential problems, such as a disrupted internet connection, faulty hardware, or misconfigured settings. By interpreting these signals correctly, you can address issues promptly, minimize downtime, and ensure your network runs smoothly.
This guide will walk you through the meaning of each TP-Link router light, explain common light behaviors, and provide practical troubleshooting tips, empowering you to get the most out of your TP-Link router.
Overview of TP-Link Router Lights
TP-Link routers are designed with user convenience in mind, and their indicator lights play a key role in communicating the device’s status. These lights are typically placed on the front panel of the router, where they are easily visible, allowing users to quickly check the router’s performance at a glance. The lights are designed to be intuitive, with universally understood colors and blinking patterns that correspond to specific functions or statuses.
General Placement and Design of Indicator Lights
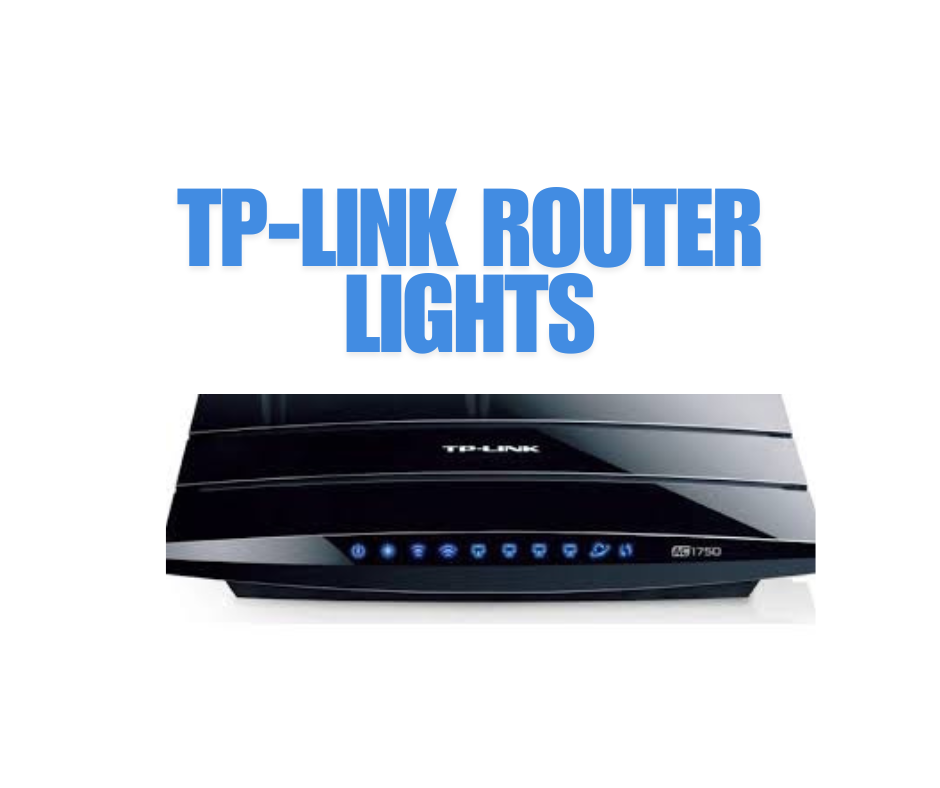
Most TP-Link routers feature a horizontal row of LED lights on the front face or top panel. These lights are strategically aligned to ensure visibility, even when the router is mounted on a wall or tucked into a shelf. In some models, the lights are accompanied by small icons or labels to indicate their specific functions, such as “Power,” “Internet,” or “Wi-Fi.”
The LED lights are crafted to balance clarity and subtlety. They are bright enough to be noticeable in daylight but not so intense as to cause distraction in darker environments. Many newer TP-Link routers even offer the option to dim or turn off the lights via the TP-Link Tether app or router settings, catering to users who prefer minimal light pollution.
Common Types of Lights Found on TP-Link Routers
The exact number and type of lights may vary between models, but most TP-Link routers feature the following common indicators:
- Power Light: Indicates whether the router is powered on and functioning.
- Internet Light: Shows the status of the router’s connection to the internet.
- Wi-Fi Lights: Represent the activity and status of the 2.4GHz and 5GHz wireless bands.
- Ethernet Lights: Indicate the connectivity and activity of wired devices plugged into the router’s LAN ports.
- WPS Light: Signals the status of the Wi-Fi Protected Setup function, used for secure device pairing.
- System Light: Found in advanced models, this light provides an overall indication of the router’s health and performance.
- USB Light (if applicable): Indicates the status of connected USB devices, such as external storage or printers.
Each of these lights has its own unique color codes and behavior patterns (solid, blinking, or off), all of which are designed to convey important information about the router’s current state. In the following sections, we’ll explore these behaviors in detail to help you better understand your TP-Link router.
Meaning of Each TP-Link Router Light
The indicator lights on a TP-Link router are designed to provide users with quick insights into the device’s operation and network status. Understanding the behavior of each light can help you identify the router’s current state and troubleshoot issues effectively.
Power Light
- Solid On: The router is powered on and functioning normally.
- Off: The router is either not receiving power or has been turned off. Check the power adapter and wall outlet if this light remains off.
- Blinking: Indicates that the router is booting up or performing a firmware update. During this time, avoid unplugging the device to prevent potential damage.
Internet Light
- Solid Green/White: The router has successfully connected to the internet.
- Orange/Yellow: Indicates limited or no internet connectivity. This could be due to issues with your modem or ISP.
- Blinking: Suggests active data transmission between the router and the internet.
- Off: The router is not connected to the internet. Check the modem connection and ensure the cables are properly secured.
Wi-Fi Lights (2.4GHz and 5GHz)
- Solid On: The respective Wi-Fi band (2.4GHz or 5GHz) is active and ready for devices to connect.
- Blinking: Indicates wireless activity, such as devices connecting to the network or data transmission in progress.
- Off: The Wi-Fi band is disabled. You can enable it through the router’s settings or the TP-Link Tether app.
Ethernet Lights
- Solid On: A device is connected to one of the LAN ports via an Ethernet cable.
- Blinking: Indicates active data transfer between the connected device and the router.
- Off: No devices are connected to the LAN ports, or the connection is inactive. Verify the cables and device settings if the light remains off while a device is connected.
WPS Light
- Blinking: The WPS (Wi-Fi Protected Setup) function is active, and the router is waiting to establish a secure connection with another device. This process typically lasts for two minutes.
- Solid On: A successful WPS connection has been established.
- Off: WPS is not in use.
System Light (On models with this feature)
- Solid Green/White: Indicates the router is functioning correctly.
- Blinking: May signal that the router is booting, performing diagnostics, or encountering an issue such as overheating. Refer to the user manual if this behavior persists.
- Off: The system is not operational or has encountered a critical issue. A reset or further troubleshooting may be required.
Common Light Behaviors and What They Mean
Understanding the different light behaviors on your TP-Link router is essential for diagnosing network problems and ensuring the router is operating at its best. These behaviors typically fall into three categories: solid, blinking, and off lights. Each type of behavior indicates specific actions or statuses, and recognizing these patterns can help you identify and address any issues quickly.
Solid Lights vs. Blinking Lights
Solid Lights
A solid light on your TP-Link router generally indicates a stable, active connection or functionality. The light stays on continuously and does not change unless there is a need for an update or a problem. Common solid light behaviors include:
- Power Light: Solid on means the router is powered up and functioning.
- Internet Light: A solid green or white light indicates a stable connection to the internet, meaning the router has successfully established communication with your ISP.
- Wi-Fi Lights: A solid light (usually green or white) on the 2.4GHz or 5GHz bands means the wireless network is active and ready for devices to connect.
- Ethernet Light: A solid light shows that a device is properly connected to the router via an Ethernet cable.
In general, a solid light indicates that everything is functioning as it should, and no immediate action is necessary.
Blinking Lights
Blinking lights are an indication that data is being transmitted or that the router is in the process of performing a task. This could include establishing connections, processing network traffic, or updating firmware. Common blinking behaviors include:
- Power Light: If blinking, the router is in the process of booting up or performing a firmware update. This is typically normal but should only last for a few minutes.
- Internet Light: Blinking usually indicates data transmission between the router and the internet. If the light blinks continuously without a solid green or white light following, it could mean the router is having trouble establishing or maintaining an internet connection.
- Wi-Fi Lights: When blinking, these lights show active wireless network usage, such as when a device is sending or receiving data.
- Ethernet Light: A blinking Ethernet light shows data transfer over the wired connection. If the light blinks but no device is connected, it could indicate network traffic from a malfunctioning or unnecessary device.
Blinking lights typically signal that your router is active and performing tasks like data transmission or connecting devices. However, if the blinking behavior is persistent (for example, an Internet light that continually blinks without ever solidifying), it may point to a connectivity issue.
Off Lights and Their Implications
When a light is off, it generally signals that the corresponding function is not active or there is a problem. While the specific meaning can vary depending on the light in question, some common off-light implications include:
- Power Light: If this light is off, your router is not receiving power. This could be due to an unplugged power cable, a faulty power adapter, or a problem with your electrical outlet. Try checking connections or plugging the router into a different outlet.
- Internet Light: An off Internet light indicates that the router is not connected to the internet. This could be because the modem is not working, the connection between the router and modem is faulty, or there’s an issue with your ISP. You can try restarting both your router and modem, checking cables, or contacting your ISP for further assistance.
- Wi-Fi Lights: If the Wi-Fi light is off, it means that the Wi-Fi feature is either disabled or not working properly. You may need to enable Wi-Fi through the router’s settings or use the TP-Link app to check for issues.
- Ethernet Lights: If an Ethernet light is off, it could mean that no device is connected to that particular LAN port, or there is no data being transmitted through the port. Ensure the device is connected correctly and that cables are undamaged.
- WPS Light: If the WPS light is off, the WPS feature is not in use. You can activate WPS on your router through the web interface or the WPS button if you’re trying to pair a device.
- System Light: If the system light is off, the router may have encountered a serious issue, such as a failure during startup, a firmware malfunction, or a hardware issue. You may need to reset the router or contact customer support if this persists.
Unusual Light Patterns and Potential Issues
While solid, blinking, and off lights are relatively straightforward, unusual light patterns can sometimes indicate more complex issues. These patterns might not always be documented in the user manual, but they generally point to underlying problems that need attention. Common unusual behaviors include:
- Flashing Between Colors: Some routers may flash between colors (e.g., green and amber) on the Internet or Power light. This usually indicates an issue with the connection. If it’s the internet light flashing between colors, it may suggest that the router is struggling to connect to the internet or there is an issue with your ISP.
- All Lights Flashing Simultaneously: This is often a sign that the router is undergoing a firmware update or system reset. However, if all lights flash without ceasing for an extended period, it could indicate a malfunction or that the router is stuck in a boot loop. A reboot or reset might resolve this issue.
- Wi-Fi Lights Alternating or Flickering: If the 2.4GHz and 5GHz lights alternate between solid and blinking quickly, it may suggest interference or a problem with wireless performance. Consider moving the router to a less crowded location or changing the channel settings.
- System Light Blinking Rapidly: If the system light blinks rapidly or continuously, it often means the router is experiencing an internal issue, such as a hardware malfunction, overheating, or firmware corruption. A factory reset may help, but if the problem persists, the router might need to be replaced.
Troubleshooting TP-Link Router Light Issues
When the indicator lights on your TP-Link router display unusual behaviors, they serve as vital clues to potential network issues. Understanding how to troubleshoot these problems based on light behaviors can help restore functionality quickly and minimize downtime. Below are practical steps to resolve common light-related issues.
1. Analyze Light Behavior
Start by observing the router lights carefully:
- Power Light: If off or blinking for an extended period, ensure the router is properly plugged in and receiving power.
- Internet Light: A yellow, orange, or off light often signals connectivity problems. Confirm your modem is functioning and all cables are secure.
- Wi-Fi Lights: If off or blinking irregularly, verify that the Wi-Fi is enabled in the router’s settings.
- Ethernet Lights: Ensure the connected devices are powered on and using functional cables if these lights are off.
- WPS Light: If blinking but failing to connect, ensure the target device supports WPS and is within range.
2. Basic Troubleshooting Steps
Check Physical Connections
- Confirm that the power cable is securely connected to both the router and the outlet.
- Inspect Ethernet cables for damage and ensure they are properly plugged into the correct ports.
- For Internet issues, verify that the cable between the router and modem is intact and properly seated.
Restart the Router and Modem
- Turn off the router and modem, wait for 30 seconds, then turn them back on. This can often resolve minor issues and restore proper light behaviors.
- Wait for the lights to stabilize. Power and Internet lights should typically turn solid.
Verify Internet Service
If the Internet light is off or orange:
- Check if your ISP is experiencing outages by visiting their website or calling support.
- Connect a device directly to the modem via an Ethernet cable to see if the issue lies with the router or the ISP.
3. Perform a Router Reset
A reset can resolve persistent or complex issues:
Soft Reset
- Locate the reset button (usually a small pinhole at the back).
- Press and hold the button for 10 seconds using a paperclip or similar tool.
- Release the button and allow the router to reboot.
Factory Reset
Use this option as a last resort:
- Press and hold the reset button for 30 seconds until all lights blink or the Power light changes.
- Be aware that this will erase custom settings, including Wi-Fi passwords and network configurations.
4. Update Firmware
Outdated firmware can cause unusual light behaviors. Updating your router’s firmware is a straightforward process:
- Access the TP-Link Web Interface:
- Open a browser and type http://tplinkwifi.net or the router’s IP address.
- Log in using your credentials (default username and password are often “admin”).
- Check for Updates:
- Navigate to the System Tools or Firmware Upgrade section.
- Click Check for Updates. If a new firmware version is available, download it.
- Install the Update:
- Follow the on-screen instructions to upload the firmware file and update the router.
- Ensure the router remains powered on during the update to avoid corruption.
5. Address Persistent Issues
Interference Problems
- If Wi-Fi lights are blinking inconsistently or devices are experiencing weak connections, try relocating the router to a central location away from walls, appliances, and other electronic devices.
Replace Faulty Components
- A consistently off or malfunctioning Ethernet or Internet light might indicate a defective cable. Replace cables to rule out physical damage.
6. Contact TP-Link Support
If the lights still indicate issues after troubleshooting, it may be time to reach out for expert help:
- Prepare Details: Note the router model, firmware version, and specific light behaviors.
- Contact Methods:
- Visit the TP-Link support website and use their live chat or support ticket system.
- Call the customer support hotline listed in the user manual.
- Warranty Check: If hardware failure is suspected, inquire about warranty coverage for repairs or replacements.
Customizing Light Settings (If Applicable)
Modern TP-Link routers often include the option to customize their indicator lights, offering greater control over brightness or the ability to turn lights off entirely. These settings, typically available through the TP-Link Tether app or the router’s web interface, can be particularly helpful in specific scenarios. Below, we explore how to customize these settings and why you might consider doing so.
Customizing Lights Through the TP-Link Tether App
The TP-Link Tether app provides an intuitive way to manage your router’s settings, including its light behavior. Follow these steps to adjust light settings:
- Download the TP-Link Tether App
- Available on both iOS and Android, download the app from your device’s app store.
- Ensure your device is connected to the TP-Link router’s Wi-Fi.
- Log In to the Router
- Open the app and log in using your TP-Link ID or the router’s local credentials.
- Select your router from the device list.
- Access the Light Settings
- Navigate to the Settings or Device section of the app.
- Look for the LED Control or similar option.
- Adjust Light Behavior
- Turn Off Lights: Some routers allow you to disable lights entirely for a distraction-free environment.
- Set Brightness: Adjust the brightness level to dim the lights, making them less intrusive at night.
- Schedule Lights: On certain models, you can create schedules to turn lights on or off at specific times.
Customizing Lights Through the Router’s Web Interface
If you prefer using a computer, the router’s web interface offers similar customization options:
- Access the Web Interface
- Open a browser and type http://tplinkwifi.net or the router’s IP address.
- Log in using your username and password (default credentials are usually “admin” for both).
- Locate the Light Settings
- Go to the Advanced Settings or System Tools menu.
- Look for LED Control or an equivalent option.
- Make Adjustments
- Disable lights completely or adjust brightness levels as desired.
- Save your changes to apply them instantly.
Scenarios Where Customization May Be Beneficial
While indicator lights are essential for monitoring the router’s status, there are situations where customizing or turning them off can enhance your experience:
1. Reducing Distractions in Bedrooms or Offices
Bright or blinking lights can be disruptive in environments requiring low light, such as bedrooms or home offices. Dimming or disabling the lights can help maintain a comfortable atmosphere.
2. Maintaining Aesthetic Appeal
In living rooms or stylish setups, router lights might clash with the overall décor. Turning off lights can keep the space clean and uncluttered.
3. Eliminating Nighttime Glare
If your router is placed in a visible location, such as a hallway or bedside table, its lights can create unwanted glare at night. Customization allows you to minimize this issue without compromising functionality.
4. Preventing Distraction in Public or Shared Spaces
In offices or common areas, excessively bright lights can draw unnecessary attention. Customizing light behavior ensures the router blends seamlessly into the background.
Read more: why is my xfinity router blinking orange
Conclusion
Understanding TP-Link router lights is essential for maintaining a reliable and efficient home or office network. These indicator lights provide a visual representation of your router’s performance, connectivity, and health, acting as your first line of insight during troubleshooting. By familiarizing yourself with the meaning behind each light, common light behaviors, and effective troubleshooting steps, you can address potential issues swiftly and keep your network running smoothly.
Additionally, the ability to customize light settings adds a layer of convenience, allowing you to tailor the router’s appearance and functionality to suit your environment and needs. Whether you’re resolving connectivity problems, adjusting lights to reduce distractions, or upgrading firmware for optimal performance, understanding TP-Link router lights ensures that you remain in control of your network.
With these insights, you’ll not only troubleshoot with confidence but also make the most of your TP-Link router’s advanced features, ensuring a seamless and hassle-free internet experience.

