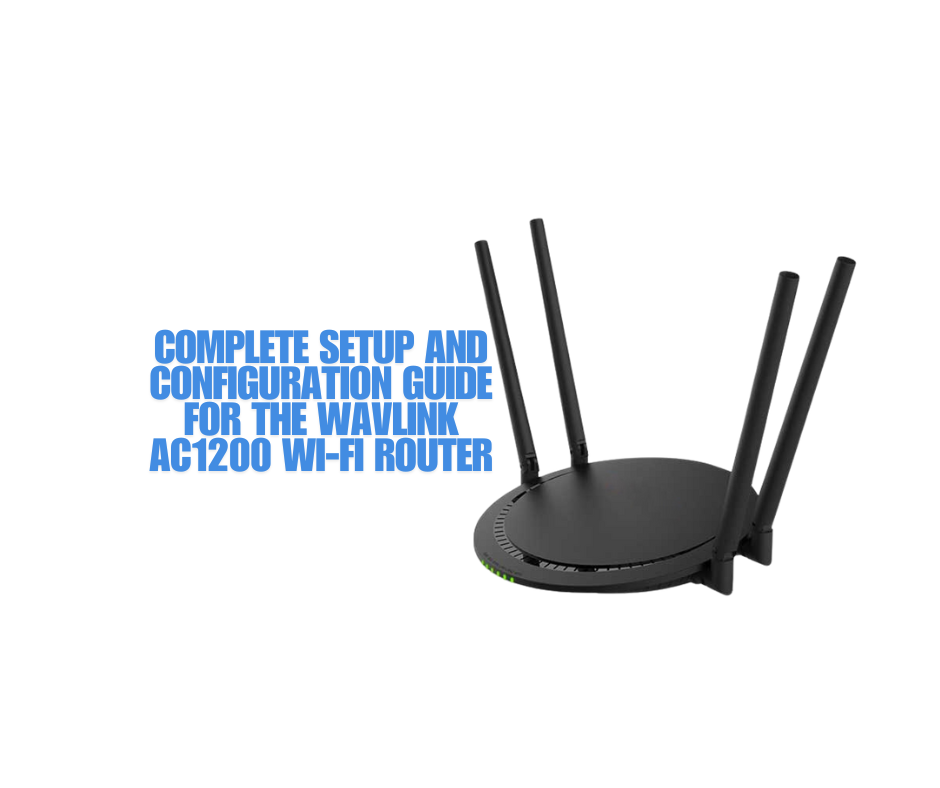
The Wavlink AC1200 is a high-performance dual-band Wi-Fi router designed to deliver fast, reliable, and secure internet connectivity to homes and small offices. With its cutting-edge technology and user-friendly features, it provides an optimal solution for streaming, gaming, and everyday browsing. Whether you’re looking to boost your existing Wi-Fi coverage or set up a new network, the Wavlink AC1200 is a great choice for a seamless online experience.
Key Features and Benefits of the AC1200 Model
- Dual-Band Technology: One of the standout features of the Wavlink AC1200 is its dual-band capability. It operates on both the 2.4 GHz and 5 GHz frequency bands, allowing you to choose the optimal band depending on your needs. The 2.4 GHz band is ideal for activities like web browsing and emailing, while the 5 GHz band provides faster speeds and less interference, making it perfect for HD streaming, online gaming, and other high-bandwidth activities.
- AC1200 Speeds: The router supports combined speeds of up to 1200 Mbps (300 Mbps on the 2.4 GHz band and 867 Mbps on the 5 GHz band). This means you can enjoy faster internet speeds for all your connected devices, reducing buffering times and ensuring smooth performance even when multiple users are online simultaneously.
- Easy Setup and Installation: The Wavlink AC1200 is designed with simplicity in mind, offering an intuitive setup process. Whether you’re a tech novice or an expert, getting your router up and running is a hassle-free experience. The installation guide and the Wavlink AC1200 manual PDF provide detailed instructions that ensure you can quickly configure your router and get online without any issues.
- Enhanced Security Features: With built-in WPA2 encryption, the Wavlink AC1200 ensures your network is secure and protected from unauthorized access. Additionally, the router features a guest network option, allowing you to create a separate Wi-Fi network for visitors, keeping your primary network secure.
- Wide Coverage: The router is equipped with high-gain antennas that extend your Wi-Fi coverage, allowing you to reach every corner of your home or office. This makes the Wavlink AC1200 an excellent option for large spaces or multi-floor homes.
- Multiple Device Support: The AC1200 router is designed to handle multiple devices simultaneously without sacrificing performance. Whether it’s smartphones, tablets, laptops, or smart home devices, the router efficiently manages network traffic to provide stable connections for all your devices.
The Wavlink AC1200 Wi-Fi router offers robust performance, excellent coverage, and a range of features that make it ideal for modern households and small offices. Whether you’re upgrading your existing network or setting up a new one, the AC1200 delivers a seamless online experience for a wide variety of users.
How to Set Up Wavlink AC1200
Setting up the Wavlink AC1200 router is a straightforward process that can be completed in just a few steps. This section will walk you through the entire process, from the initial connections to powering up and configuring your network.
Step-by-Step Guide to Setting Up Your Wavlink AC1200 Router
Step 1: Unbox the Router and Prepare for Setup Start by unboxing your Wavlink AC1200 router and ensuring that all components are present. Inside the box, you should find:
- The Wavlink AC1200 router
- Power adapter
- Ethernet cable
- Quick start guide
- High-gain antennas (if not pre-attached)
Step 2: Position the Router Before connecting any cables, choose a location for the router. Ideally, place it in a central area of your home or office to ensure maximum coverage. Keep the router away from large metal objects, thick walls, or electronics that could cause interference. Make sure there’s a power outlet nearby.
Step 3: Attach the Antennas If the antennas are not already attached, screw them into the router’s antenna ports. Adjust them to a vertical position for optimal signal distribution.
Step 4: Connect the Router to the Modem Using the provided Ethernet cable, connect the WAN (Wide Area Network) port on the Wavlink AC1200 to your modem. The WAN port is usually located on the back of the router and is typically colored differently (often blue) for easy identification.
Step 5: Plug in the Power Adapter Connect the power adapter to the router and plug it into an electrical outlet. You should see a power light illuminate on the front of the router, indicating that the device is powered on and ready to be set up.
Step 6: Power Up the Router Allow the router to boot up. This can take a couple of minutes. The router will go through its initialization process, and you’ll notice the power light blinking as the system connects to the network.
Step 7: Connect to the Router’s Wi-Fi Network Once the router is powered up and ready, locate the default Wi-Fi network name (SSID) and password, which are usually printed on a label attached to the back or underside of the router.
- On your computer, smartphone, or tablet, go to the Wi-Fi settings and search for the default Wi-Fi network name (SSID) of your Wavlink AC1200 router.
- Select the network, enter the default password, and connect to the router.
Step 8: Access the Router’s Login Page To configure your router, you’ll need to access its web interface. Open a browser and type in the default IP address of the router (usually 192.168.10.1) in the address bar. This will take you to the Wavlink AC1200 login page.
You will be prompted to enter a username and password. The default username and password are typically:
- Username: admin
- Password: admin (or password, depending on the model)
Once logged in, you can begin configuring your router’s settings.
Step 9: Follow the Setup Wizard After logging in, the Wavlink AC1200 will prompt you to run the setup wizard. This is an easy-to-follow guide that will assist you in configuring your router’s network settings. You’ll be able to:
- Set a custom network name (SSID) for both the 2.4 GHz and 5 GHz bands
- Create a secure Wi-Fi password
- Set up any advanced features like guest networks or parental controls
- Choose your time zone
Step 10: Finalize the Setup Once the setup wizard is complete, the router will save your settings, and your Wi-Fi network should be ready to use. You can now connect your devices to your new Wavlink AC1200 Wi-Fi network using the credentials you just set up.
Initial Connections and Power-Up Instructions
When you first power on your Wavlink AC1200 router, the initial boot-up process can take a few moments. Here’s what you can expect:
- The power light will blink and then turn solid once the router is ready.
- The WAN light will blink to indicate that the router is communicating with the modem.
- Once the router has established a connection, the Wi-Fi lights for the 2.4 GHz and 5 GHz bands will turn solid, indicating that your wireless network is ready for use.
If the router does not automatically connect to the internet, you may need to restart your modem or check that all cables are securely connected. You can also log into the router’s settings page to troubleshoot further if needed.
Wavlink AC1200 Installation Guide
Installing the Wavlink AC1200 router is a straightforward process that ensures your home or office gets a fast, reliable internet connection. Whether you’re setting it up in a single room or across multiple floors, following a few key steps will ensure that your router performs at its best. This guide will provide detailed instructions for installing the Wavlink AC1200, including how to choose the right location and connect devices to the network.
Detailed Instructions for Installing the Wavlink AC1200 at Home or Office
Step 1: Unbox and Prepare the Router Begin by carefully unboxing your Wavlink AC1200 router. Inside the box, you’ll find the router, power adapter, Ethernet cable, installation guide, and any detachable antennas. Make sure you have all components ready before starting the installation process.
Step 2: Connect the Router to Your Modem
- Locate the WAN Port: On the back of the Wavlink AC1200, find the blue WAN (Wide Area Network) port. This port is used to connect the router to your internet modem.
- Use the Ethernet Cable: Plug one end of the provided Ethernet cable into the WAN port on the router and the other end into the modem’s Ethernet port.
Step 3: Power Up the Router
- Attach the Power Adapter: Plug the power adapter into the router and connect it to an electrical outlet.
- Wait for Boot-up: After powering up the router, wait for a couple of minutes as it goes through its initialization process. You will see the power light blink and then turn solid once the router is fully booted up.
Step 4: Power Up the Modem If your modem is not already turned on, power it up now. Allow the modem to establish a connection with your internet service provider (ISP). This process may take a few moments. Once the connection is established, the lights on both the modem and the router will typically turn solid to indicate they are both functioning properly.
Choosing the Right Location for Optimal Signal Strength
The placement of your Wavlink AC1200 router is essential to ensuring maximum Wi-Fi performance and coverage. A well-chosen location can help reduce dead zones and improve your internet experience.
Key Placement Considerations:
- Central Location: Position the router in a central location within your home or office. This will allow for even distribution of the Wi-Fi signal across multiple rooms and areas. Avoid placing the router near the edges of the house, as this can result in weak signal strength in the far corners.
- Elevate the Router: If possible, place the router on a shelf or higher surface, as Wi-Fi signals tend to travel better when elevated. Avoid putting the router on the floor, as this can interfere with signal strength.
- Avoid Obstructions: Keep the router away from large metal objects, thick walls, microwaves, and other electronics that could cause interference. These obstacles can weaken the Wi-Fi signal and reduce overall performance.
- Antennas: Adjust the router’s antennas to a vertical position to ensure even signal distribution. Some routers allow for antenna adjustments, so you may experiment with angles for optimal performance, particularly in multi-floor spaces.
Connecting Devices to the Router
Once your Wavlink AC1200 router is powered on and placed in an optimal location, you can begin connecting devices to the network. The router’s dual-band Wi-Fi allows you to connect devices to either the 2.4 GHz or 5 GHz band, depending on your needs.
Step 1: Find the Wi-Fi Network Name (SSID)
- On the back or bottom of the router, you will find the default Wi-Fi network name (SSID) and password printed on a label. This information is used to connect devices to the router’s network.
Step 2: Connect Wireless Devices
- For Computers, Smartphones, and Tablets: Open the Wi-Fi settings on your device and look for the network name (SSID) of your Wavlink AC1200. Select the network and enter the password when prompted. Once connected, you will have access to the internet.
- For Multiple Devices: The Wavlink AC1200 router can handle multiple devices at once. If you have several devices that need a stable internet connection, it’s a good idea to use both the 2.4 GHz and 5 GHz bands. Devices that require faster speeds (such as gaming consoles or streaming devices) should be connected to the 5 GHz band, while regular browsing devices can connect to the 2.4 GHz band.
Step 3: Wired Device Connections
- If you prefer a wired connection, use the provided Ethernet cable to connect your computer or other wired devices to one of the four LAN (Local Area Network) ports on the back of the router. This ensures a stable, high-speed connection.
Step 4: Finalize the Setup
- After connecting all your devices, you can access the router’s settings via the Wavlink AC1200 login page (usually at 192.168.10.1). From here, you can customize your Wi-Fi settings, create a guest network, enable security features, and configure advanced settings. You may also want to change the default network name (SSID) and password to something more personalized.
The Wavlink AC1200 installation process is simple and straightforward. By following the steps above, you will ensure your router is properly installed and positioned for optimal performance. Once connected, you can enjoy fast, reliable internet access throughout your home or office, with the flexibility to customize your network settings to suit your needs.
Accessing the Wavlink AC1200 Login Page
Once your Wavlink AC1200 router is powered on and connected, the next step is to access the router’s login page to configure your settings and manage the network. This login page provides you with a user-friendly interface to adjust various network preferences, security settings, and other router configurations.
How to Access the Router’s Login Page
- Connect to the Router’s Network:
- Ensure that your device (computer, tablet, or smartphone) is connected to the Wavlink AC1200 network, either through Wi-Fi or via an Ethernet cable. You can connect to either the 2.4 GHz or 5 GHz Wi-Fi band, depending on your preference.
- Open a Web Browser:
- On your connected device, open any web browser (Google Chrome, Mozilla Firefox, Safari, etc.).
- Enter the Router’s IP Address:
- In the browser’s address bar, type the default IP address of the Wavlink AC1200: 192.168.10.1 (this is the most common default IP for the AC1200 series, but it could vary depending on the specific model).
- Login Screen:
- After entering the IP address, you will be directed to the Wavlink AC1200 login page. Here, you will be prompted to enter a username and password.
- Enter the Default Login Credentials:
- Username: admin
- Password: admin (or password, depending on your model)
- Click Login to access the router’s settings page.
Now that you’re logged into the router’s web interface, you can begin making changes to your network and security settings.
Troubleshooting Login Issues
If you encounter issues logging into the router’s interface, consider the following troubleshooting steps:
- Check the IP Address:
- Ensure you’re entering the correct IP address. If 192.168.10.1 does not work, try 192.168.1.1 or check the router’s manual for the exact IP address.
- Check Connection:
- Ensure your device is connected to the router’s network. Try reconnecting to the Wi-Fi or using an Ethernet cable if you’re using a wireless connection.
- Reset the Router:
- If you cannot remember the login credentials, you can reset the router to factory settings by pressing the reset button (usually located on the back of the router). Hold it down for 10–15 seconds, and the router will be reset. You can then use the default credentials to log in.
- Clear Browser Cache:
- Sometimes, cached data can interfere with accessing the login page. Clear your browser’s cache and cookies and try accessing the login page again.
AC1200 Wi-Fi Router Configuration
After logging into the router’s settings page, you can begin customizing various settings to suit your network needs. The Wavlink AC1200 offers a range of configuration options to improve performance and security.
Customizing Settings for Network Name (SSID), Password, and Security Protocols
- Change the Network Name (SSID):
- In the router settings, navigate to the Wireless Settings section. You will see options to change the network name (SSID) for both the 2.4 GHz and 5 GHz bands.
- Choose a unique SSID for each band (optional but recommended). This helps distinguish between the two bands when connecting devices.
- Set a Wi-Fi Password:
- Set a secure password for your Wi-Fi network by selecting WPA2 or WPA3 as the encryption method (WPA3 is recommended for enhanced security). Enter a strong password that is at least 8 characters long, mixing letters, numbers, and special characters.
- Enable Network Security:
- Ensure your router is using proper security protocols such as WPA2-PSK (AES) or WPA3 to prevent unauthorized access. Avoid using WEP as it is outdated and not secure.
Configuring Wi-Fi Bands (2.4 GHz vs 5 GHz)
- 2.4 GHz Band Configuration:
- The 2.4 GHz band is great for longer-range connections but provides slower speeds compared to the 5 GHz band. It is ideal for devices that don’t require a high-speed connection, such as smartphones or basic web browsing.
- Ensure that the Enable Wireless Radio option for the 2.4 GHz band is checked.
- 5 GHz Band Configuration:
- The 5 GHz band offers faster speeds and less interference but has a shorter range. It is ideal for devices that require higher speeds, such as gaming consoles, streaming devices, or laptops.
- Enable the 5 GHz Wireless Radio option and configure the settings accordingly for devices requiring faster speeds.
- Optimize Channels:
- To avoid congestion, select the least crowded channels for both bands. The router’s web interface may offer an automatic channel selection feature, or you can manually select a channel based on less interference.
Enabling Additional Features
- Guest Network:
- If you want to offer internet access to visitors without granting them access to your main network, you can set up a Guest Network. This can be enabled in the router’s settings under the Guest Network section. You can assign a different SSID and password to this network to keep it isolated from your primary network.
- Parental Controls:
- To manage internet usage for children or other users, you can configure Parental Controls. This feature allows you to block specific websites, restrict internet access at certain times, and limit bandwidth for specific devices.
- QoS (Quality of Service):
- If you want to prioritize specific devices or applications (e.g., gaming or streaming), enable the QoS feature. This ensures that high-priority traffic gets the necessary bandwidth, while other devices may experience slower speeds.
Wavlink AC1200 Manual PDF
For a more in-depth look at the router’s features, troubleshooting, and advanced configuration options, you can refer to the Wavlink AC1200 manual PDF. This manual is an essential resource for users who need additional information or run into issues while configuring their router.
How to Access and Use the Wavlink AC1200 Manual PDF for Reference
- Download the Manual:
- You can find the Wavlink AC1200 manual on the official Wavlink website or through the Support section of the router’s login page. Simply search for “Wavlink AC1200 manual PDF,” and you should be able to download the latest version.
- Use the Manual for Quick Reference:
- The manual provides step-by-step instructions for setup, advanced configurations, and troubleshooting. If you encounter problems or need more specific details about your router, refer to the relevant sections of the PDF.
Navigating the Manual for Advanced Settings and Troubleshooting Tips
- Advanced Settings:
- The manual includes detailed information on advanced settings such as port forwarding, dynamic DNS, VPN setup, and more. These settings are useful for users who need specific network configurations.
- Troubleshooting:
- If you’re experiencing issues with the router, the troubleshooting section of the manual can help you diagnose and resolve common problems, such as slow internet speeds, connection drops, or login issues.
- Firmware Updates:
- The manual also covers how to update the router’s firmware, ensuring you have the latest features and security patches. This is essential for maintaining optimal router performance.
Accessing the Wavlink AC1200 login page and configuring the router is an essential part of getting the most out of your Wi-Fi network. By using the manual PDF and following the configuration steps, you can customize your router settings to fit your needs and ensure a secure, reliable internet connection.
Read more: Wavlink AC1200 Review: A Reliable and Affordable Dual-Band Router for Seamless Connectivity
Conclusion
Setting up and configuring the Wavlink AC1200 router is a straightforward process that ensures you can enjoy reliable, high-speed internet throughout your home or office. By following the step-by-step setup guide, you can easily establish your network, customize your Wi-Fi settings, and secure your connection. Whether you’re adjusting your network name (SSID), configuring security protocols, or optimizing the router’s features like guest networks and parental controls, the AC1200 provides everything you need for a smooth and efficient networking experience.
Accessing the router’s login page and referring to the detailed Wavlink AC1200 manual PDF ensures that you have all the resources needed to troubleshoot issues and explore advanced settings. With its dual-band Wi-Fi, intuitive configuration options, and user-friendly interface, the Wavlink AC1200 is a powerful tool to manage your home or office network, ensuring a fast, secure, and seamless online experience.

